Are you interested in starting your own online store website? You can set up an online store using WordPress but can be frightening, especially if you aren’t technical.
The good news is that you’re not alone. With hundreds of users used to build their online stores, we’ve developed a comprehensive step-by-step guide on how to use WordPress to build yours.
Table of Contents
An online business has never been more popular than it is today. It takes only a few minutes for anyone with a computer to get started.
Start your online store with these three things:
That’s it, it’s really that easy.
In less than 30 minutes, you can set up your own online store using WordPress, and we’ll walk you through the process step-by-step.
We will cover the following topics in this tutorial:
All Set? Here we go.
Choosing the wrong platform for your online store is the most common mistake users make.
You won’t commit that mistake thanks to your presence here.
You can choose between Shopify and WordPress + WooCommerce, both of which are popular eCommerce platforms.
For $29 / month (paid either monthly or yearly upfront to receive a discount), Shopify is a fully hosted eCommerce solution. With it, you can simply log in and begin selling right away. There are a few downsides to Shopify, including that it can be quite expensive, and your payment options are limited unless you pay extra.
Because of the flexibility offered by WordPress + WooCommerce, it is the choice of most users. Although it does require some setup, the long-term benefits are worth it. Website builders such as WordPress and WooCommerce are popular choices for eCommerce shops.
You will learn how to set up a WordPress store that uses WooCommerce in this tutorial.
A domain name, web hosting, and an SSL certificate are required to launch an eCommerce business.
A domain name is the internet address for your website. It is the address that people will enter into their browsers to go to your site (for example google.com or themelooks.com).
Web hosting is the location of your eCommerce website on the internet. It is the internet home of your website. Web hosting is required for every website on the internet.
Bluehost is an approved WordPress and WooCommerce hosting provider. So, you can go with Bluehost.
Bluehost may give you assistance with setting up your WordPress website upon your first login.
Proceed to the ‘I don’t need help’ link. Don’t worry, we’ll take you through the entire process.
Let’s get your WordPress website up and running.
To begin, go to Settings > General and enter your WordPress website title and description.
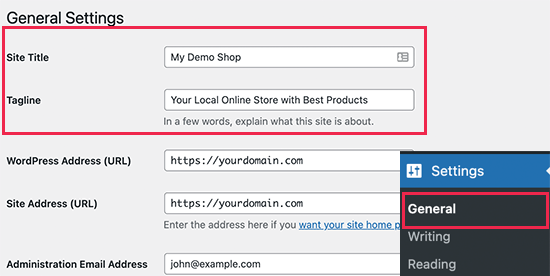
Now, a site title and an attractive description are needed. Okay, you use the store name as site title and description as you needed for your business. However, no hurry to put the description right away if you’re out of words because this is an optional section. You can put the description up later.
A free SSL Certificate was included with your WordPress hosting subscription. This certificate is already associated with your domain name. However, your WordPress site must be set up such that it loads as https rather than http.
Upgrade your WordPress Address and Website Url to https instead of http on the Settings > General tab.
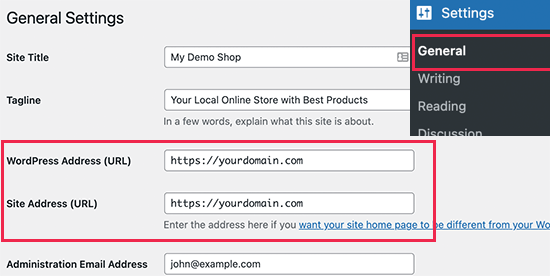
Make sure, you store your settings by clicking on the Save Changes button. To do that, scroll to the bottom of the page where you’ll find the Save Changes option.
This is how the WordPress setup completes. Therefore, let’s move on to setting up the online store.
WooCommerce is the market’s best online shop builder. It is based on WordPress, giving you the flexibility of WordPress as well as the ability to sell any sort of goods you desire.
You must first install and configure the WooCommerce plugin. For additional information, visit our step-by-step guide to installing a WordPress plugin.
Simply navigate to the Plugins > Add New page and look for WooCommerce. Click the Install Now button next to the WooCommerce listing in the search results.
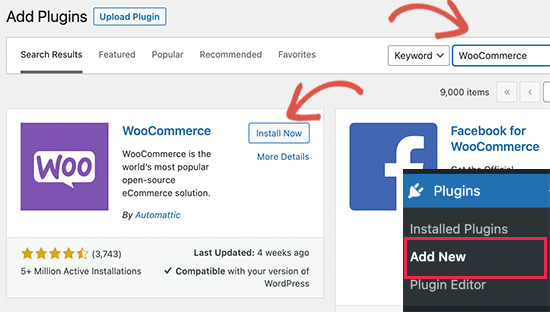
WordPress will now download and install the WooCommerce plugin. Wait for it to complete downloading the plugin before clicking the ‘Activate’ option to proceed.
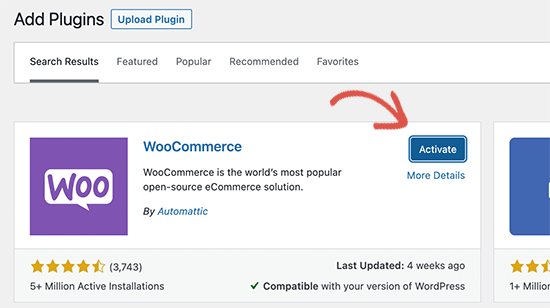
When you activate WooCommerce, it will run the setup wizard and display the Welcome to WooCommerce screen. This wizard will take you to the important settings of WooCommerce.
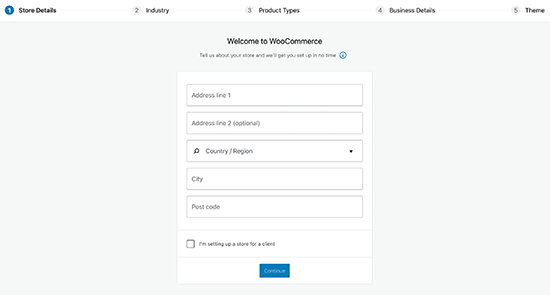
To begin, you must submit basic information about your online business, such as your location, nation, and area. If you are a merchant, you may use your shop location as the address.
Then, to go to the next stage, click the Continue option.
Following that, you’ll be prompted to select a retail industry. You can select an industry that is most closely related to the sort of shop you wish to open.
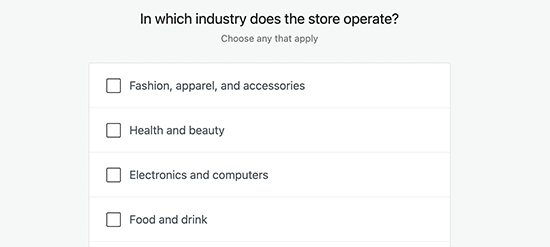
To proceed, click the continue button.
Following that, you’ll be asked to select the sorts of things you’ll offer in your store. For example, if your items require shipment, you can select physical products.
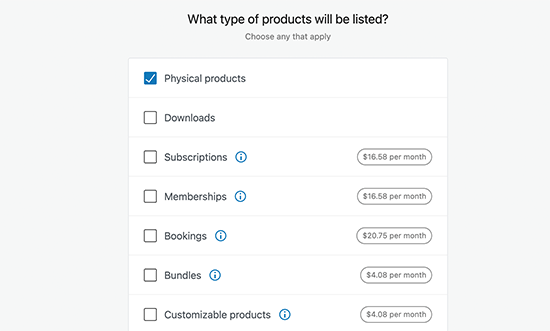
You may also select from a variety of product kinds. You can, for example, select both Physical Products and Downloads. Don’t be concerned about selling a variety of products. For each product, you may specify the type of product you want to add.
Continue By clicking the Continue button.
Following that, you’ll be asked to give basic company information, such as how many items you want to offer and whether you sell elsewhere. You can pick ‘No’ for the other option if I don’t have any items yet.
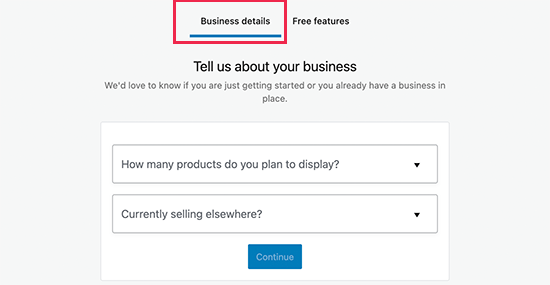
Now navigate to the ‘Free Features’ section. You’ll notice a box pre-checked to install free website features.
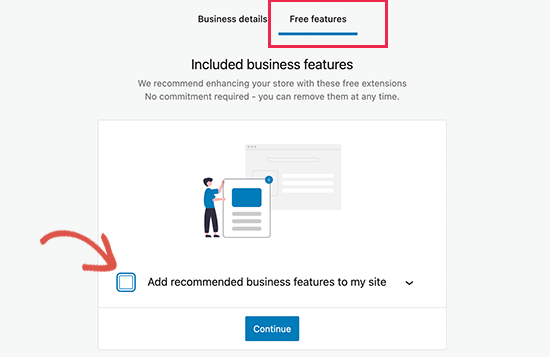
This option should be unchecked since it will install various other WooCommerce addons that you may not require. You could always install them by yourself if you need them later.
To proceed, click the Continue button.
Following that, you’ll be prompted to select a theme for your online store. You may keep your existing default theme, or you can select Storefront or any of the free alternatives offered on the website.
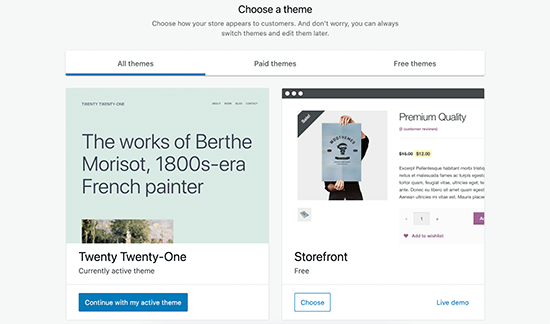
Don’t be concerned about finding the perfect theme straight soon. Later in this post, we’ll teach you how to pick the ideal theme for your online business.
That’s all; you’ve completed the basic WooCommerce setup.
Next, you must configure payment methods so that your business may take online payments. WooCommerce has a number of payment gateways that are simple to set up.
Simply navigate to WooCommerce > Settings and select the ‘Payments’ option. By default, you have the option of using PayPal Standard, Cash – On – delivery, Checks, or Bank Transfers.
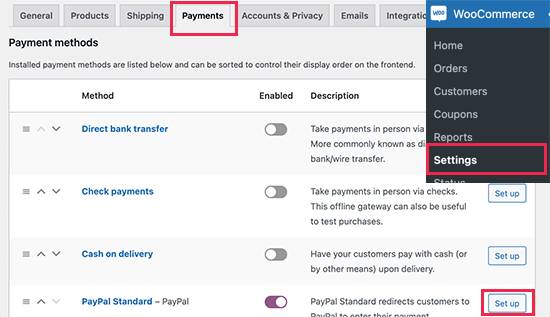
Scroll down to view the options for installing PayPal Checkout, Stripe, and WooCommerce Payments. As payment methods, we propose Stripe and PayPal Standard.
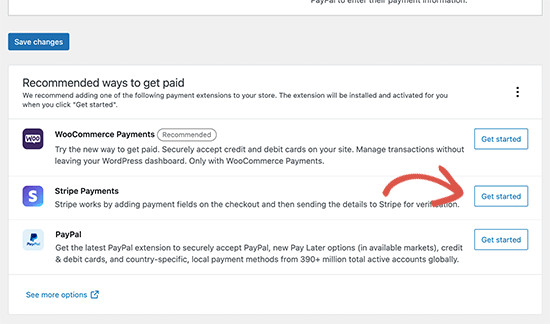
You may set up each payment gateway by clicking the setup button and entering the necessary information. You can, for example, activate Stripe and input your API Keys.
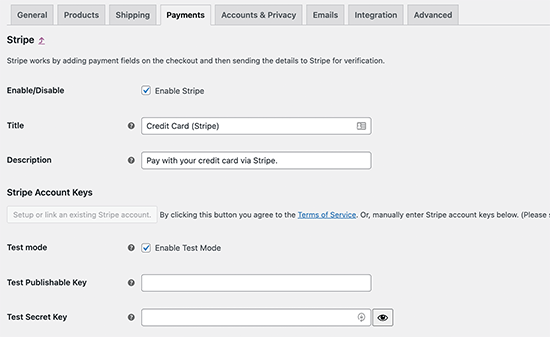
Now, click on Save Changes and store the payment settings.
Let’s begin by adding your first item to your online store. To add a new product, navigate to Products > Add New.
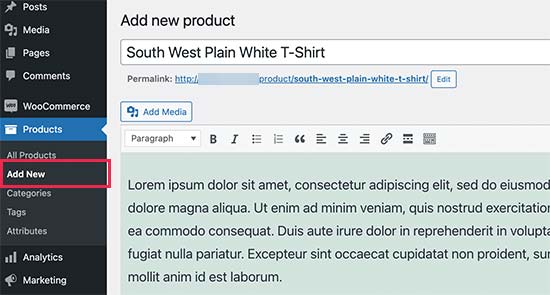
Give your product a title first, followed by a brief description.
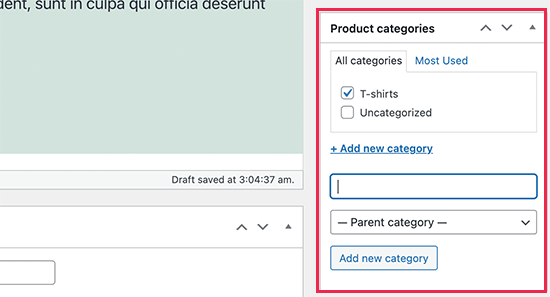
The ‘Product Categories’ box may be found in the right-hand column. To establish a category for this product, click the ‘+Add New Product Category’ button. This enables you and your clients to effortlessly categorize and explore goods.
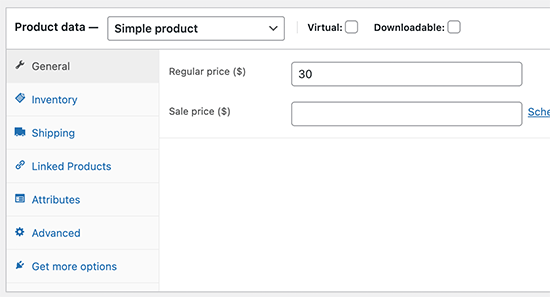
Scroll down a bit to find the Product Data box. This is where you will give product details such as price, stock, shipment, and so on.
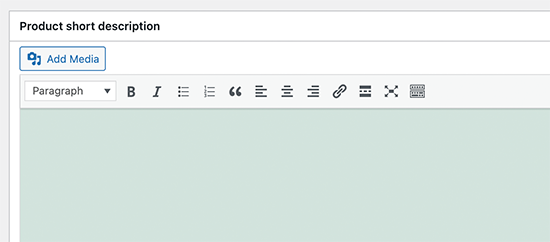
A box to enter a product brief description will appear underneath the product data box. When consumers see numerous goods on a page, these product descriptions will be displayed.
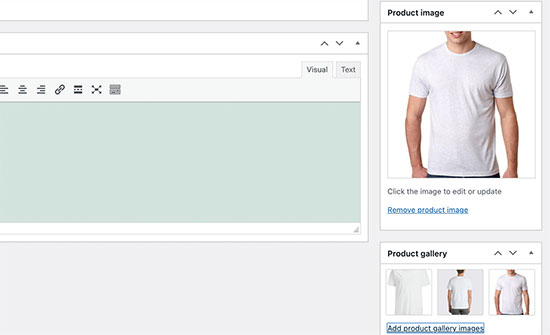
Finally, in the right-hand column, there are boxes for adding a primary product image and a product gallery.
Once you’re happy with all of the product details you’ve entered, click the Publish button to make it live on your site.
Repeat the process as required to add more goods.
Themes determine how your WordPress websites seem to people when they visit them. Control how your items are presented in a WooCommerce store.
There are many premium and free WordPress themes available to assist you in developing an eye-catching online presence.
Nevertheless, not all WordPress themes are specially intended for eCommerce stores. We’ve hand-picked some of the greatest WooCommerce themes for you to consider.
You may alter the look of a WooCommerce theme once it has been installed.
Simply navigate to Appearance > Customize. This will open a theme customizer where you may modify various theme parameters.

Most recent WooCommerce themes have several customization possibilities and operate well on both desktop and mobile platforms.
You can take a look at the below two responsive WooCommerce themes developed by ThemeLooks to create an optimized and responsive online store using WordPress.
We hope this post was useful to get a full insight into how you can set up an online store using WordPress. If you’re an enthusiast about WordPress, then you may take a look at how you can uninstall and delete a WordPress theme, also you look at this guide on how to set up WooCommerce on WordPress if you wish to make an e-commerce website using WordPress.
If you like this post, be with ThemeLooks and subscribe to our WordPress video tutorials on YouTube. We may also be found on Twitter, LinkedIn, and Facebook.