Would you like to add text overlay on images in WordPress?
The text overlay is an excellent way to add some extra information to an image. It also allows creating banners, headers, and even advertisements online quickly and easily.
The aim of this article is to demonstrate how you can add text overlay on images in WordPress.
Table of Contents
WordPress websites with images look more appealing and help to break up large blocks of text.
You may need to add more explanation to your images, though. Adding text on top of an image could be a good way to explain what it shows and why you have included it in your post.
Adding text to images for banners and headers on WordPress blogs can make them more eye-catching and informative.
The following post provides three different methods for adding text on top of an image in WordPress.
Let’s start with how you add text over images in WordPress using the image block first.
The Cover block in WordPress is a great way to add text to an image. Any image can be displayed using this block, and then text can be typed over it. As a result, the Cover block is ideal for creating banners, headers, and hero images.
In the WordPress block editor, click the plus (+) sign to add a Cover block to a page or post.
By typing in ‘Cover‘, you can now select the appropriate block.
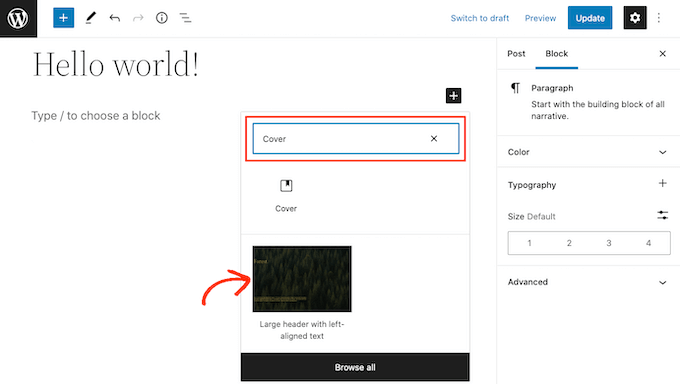
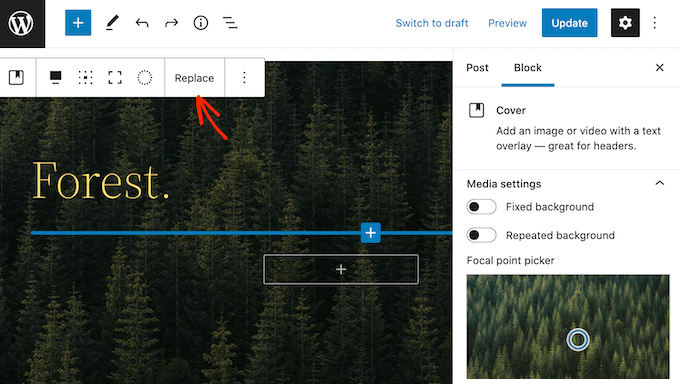
Cover blocks include placeholder images and placeholder texts by default.
Simply click the image to replace the default. Click the ‘Replace‘ button once you have finished this step.
Simply click on ‘Open Media Library‘ to choose an existing image from your WordPress media library. If you have more than one image, you can choose them all.
You can upload an image by clicking on the ‘Upload‘ icon instead.
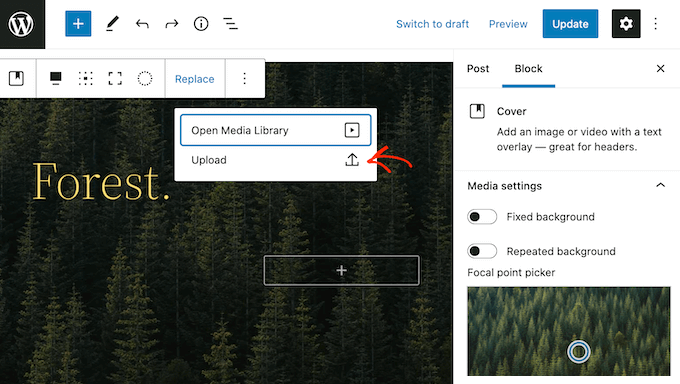
This will open a window and let you select an image from your computer.
When you choose an image, you can use the block settings to create some interesting and eye-catching effects. The image can, for instance, be fixed in place in the visitor’s browser window, or you can overlay colored text on the image.
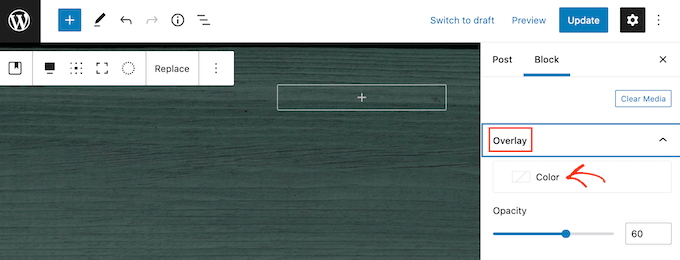
Using the ‘Opacity‘ slider, you can change the opacity of the overlay. The transparency of the overlay is controlled by the ‘Opacity‘ slider.
When you’re satisfied with how the image appears, it’s time to add some text.
The Cover block includes a Heading and a Paragraph block by default, where you may put text on top of the image.
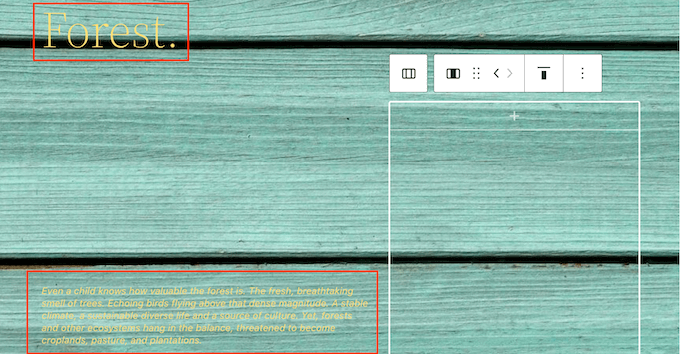
Simply click on the Heading or Paragraph block to add some text. Then enter the text that you wish to utilize.
When you add text on top of an image, it might be difficult to read sometimes. This is especially true for visitors with bad eyesight.
However, you may wish to format your content to make it simpler to read.
If you’re using a Heading block, you may also experiment with different heading styles to discover which one is easiest to understand and read.
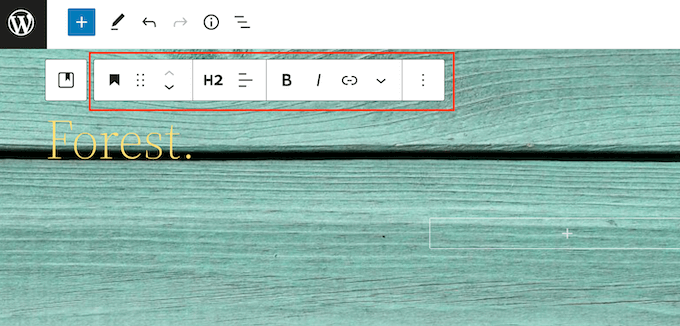
However, you can highlight your text using contrasting colors, and your text will stand out.
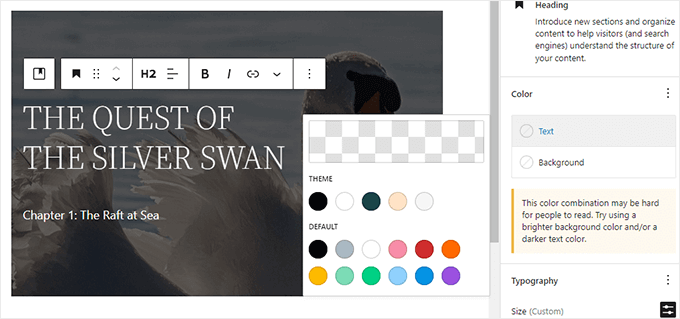
If you wish to apply a different color, go to the right-hand menu and select the ‘Block‘ tab. Following that, expand the section by clicking on ‘Color‘.
Once done, click on ‘Text.’ This brings a popup for you from where you can choose the color you want to apply to all the text.
It’s very obvious that larger text is easier to read and visible.
Having said that, click on filed next to ‘Size‘, and type the larger number there that you prefer to have.
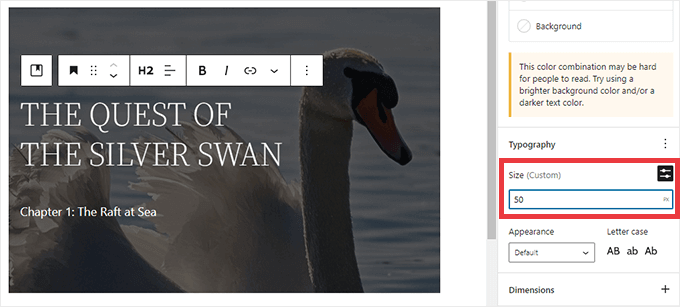
When you find yourself satisfied with the looks of your Cover block, you can go for publishing or updating the page as normal. Well, everything completes here. Now, go to your website to see the changes. You’ll find your text on top of the image eventually.
Creating banners and headers is easy with the Cover block. If you wish to add text to an image block in WordPress, you can also do so.
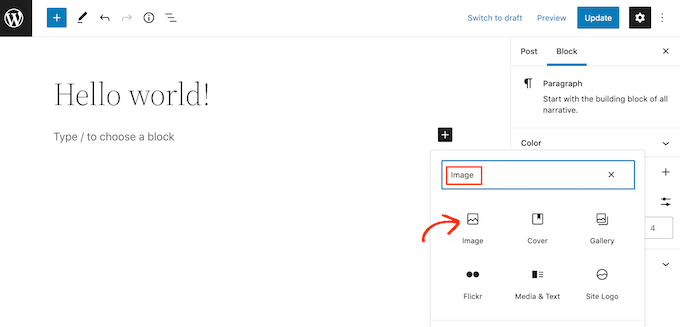
The first step is to add an Image block to your post or page. Using the WordPress block editor, just click on the plus (+) sign.
Enter the word ‘Image‘ and choose the right block to insert it into your post.
Clicking on Media Library will allow you to choose a picture from WordPress’ media library, or you can upload an image from your computer.
In the same way, described above, you can change the focal point, add an overlay, and change the opacity of your image after selecting it.
If you’re unsure what works best for your Image block, you can try using the ‘Fixed background‘ and the ‘Repeated background‘ sliders.
Once you are satisfied with your image, click the button labeled ‘Add text over image‘.
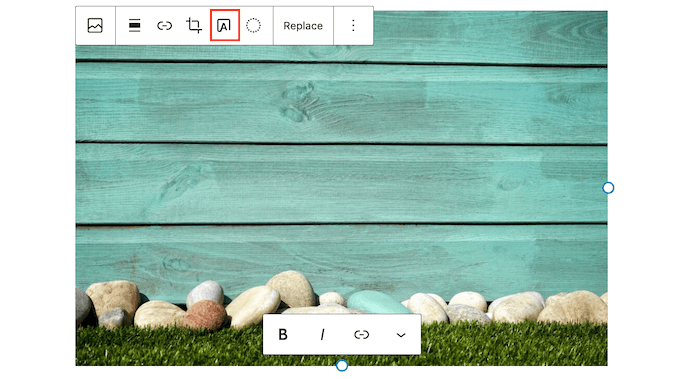
This allows you to enter text in a text area.
The text might be difficult to read, depending on your image. If the text is bold or the color is changed in the same manner described above, that may help.
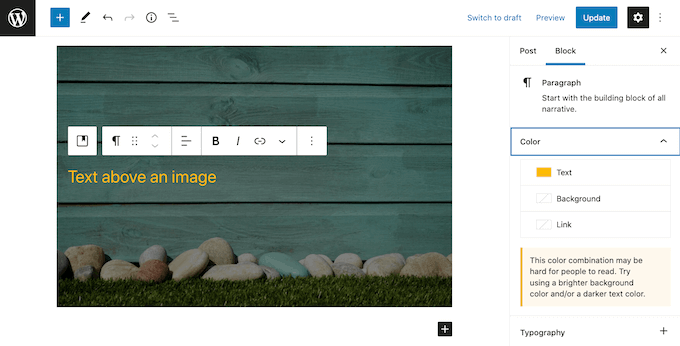
Making your text bigger may also help.
To do this, head to the right-hand menu and click the ‘Size‘ section. Now, you can choose to have your text large or small by clicking on the different numbers.
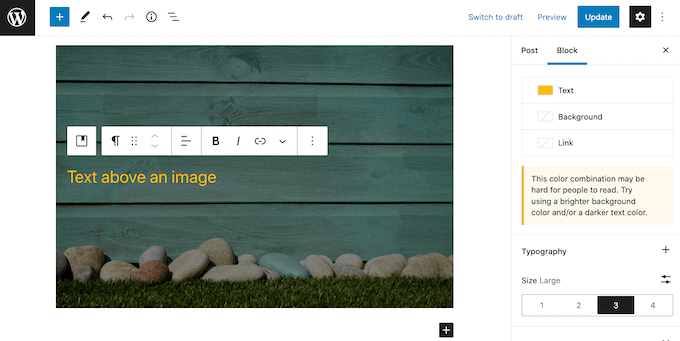
You can save your changes by clicking on Save Draft, Update, or Publish once you’re finished editing your text and image.
Using the usual ‘Gallery’ block, you can also easily add text overlay on images in a WordPress gallery.
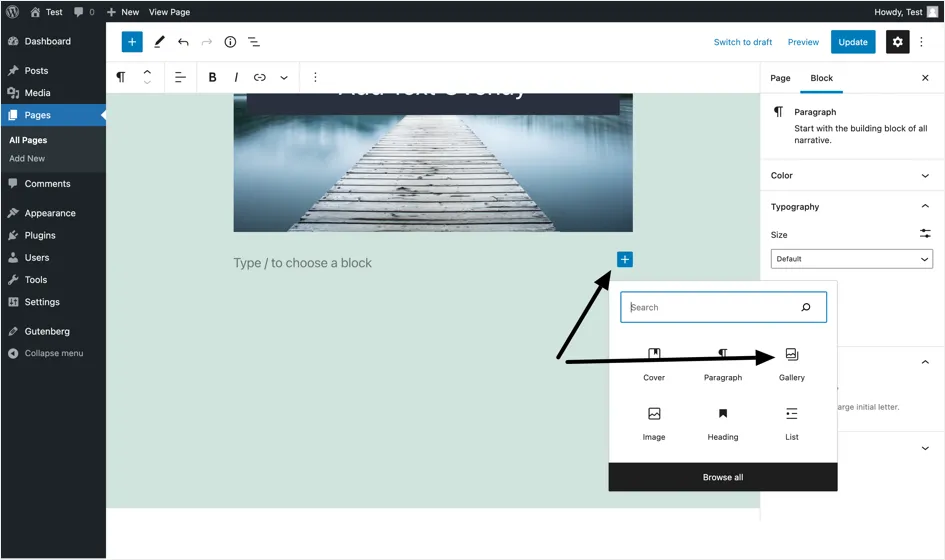
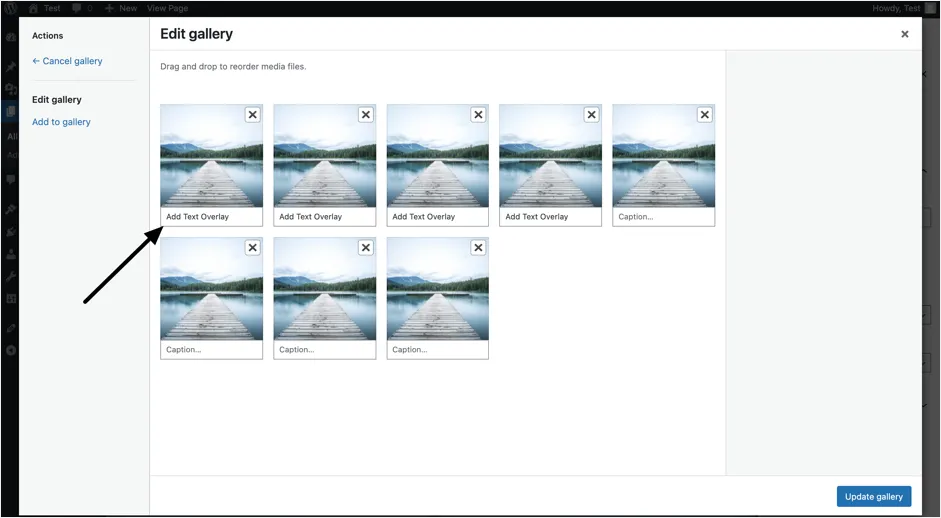
N.B: One thing to keep in mind is that if you captioned the images in the media gallery before adding the gallery block, the descriptions would display as text overlay on the gallery block. Captions are added to images after the gallery block has been created.
On the other hand, it will not display on the gallery block. In this instance, you must either manually add the captions after the gallery block is formed or delete the gallery block and re-add the block so that the newly supplied captions are utilized.
That’s all there is to it. Using WordPress’s built-in Gutenberg block editor, you can easily add a text overlay to images in WordPress.
Finally, adding text overlay to images improves your website’s appearance, design, layout, and general aesthetics, providing a great first impression on your visitors.
As always, if you have any questions or concerns regarding placing text over images in WordPress, please post them in the comments section, and we’ll do our best to assist.
You may want to see our guide on how you can clear cache files in WordPress. You may also like to see our guide on how you can add special characters in WordPress.
If you like this post, be with ThemeLooks and subscribe to our WordPress video tutorials on YouTube. We may also be found on Twitter, LinkedIn, and Facebook.