
Would you like to know how to create an image gallery in WordPress right away? If YES, then you’re certainly in the right place. READ ON!
Using an image gallery, you can add photos in rows and columns. Having an image gallery in WordPress lets you display more photos in less space. As a result, it’ll be easier for users to browse the images.
So, in the entire article, you’ll be walked through us to know how you can create an image gallery in WordPress easily. Thus, your photos in WordPress will look even better without losing their quality.
Table of Contents
It’s incredibly easy to add images to your blog posts and pages with WordPress. All you need to do is upload your image and add the image block.
The images will, however, appear one after another if you add more than one image. We don’t think it looks great, and it will take a long time for your users to view all of them.

The gallery displays images in columns and rows according to a grid layout. You can also use thumbnails. Using thumbnails, users can view the full images by clicking on them.
It will look much more professional, and you will be able to share more photos in less space.
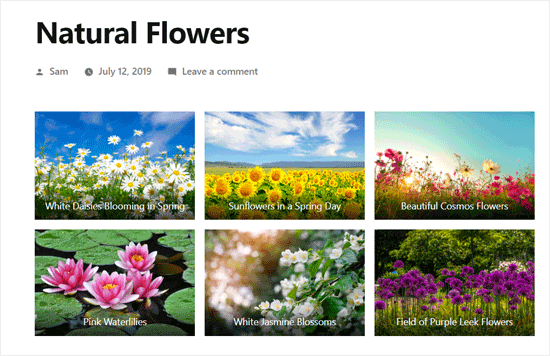
It is actually very easy to create a photo gallery using WordPress. With WordPress’s new block editor, it’s easy to create a WordPress gallery with just a few clicks.
For more robust image galleries with more features, you can also use WordPress plugins.
Our tutorial shows you how to create a photo gallery in WordPress using both methods.
Let’s start with the WordPress block editor (without plugin) method and create a photo gallery easily.
You can create a gallery in WordPress using a built-in feature. Despite its simplicity and limited options, even a basic version of this feature will get the job done.
Here’s a step-by-step guide for creating an image gallery without using a plugin in WordPress.
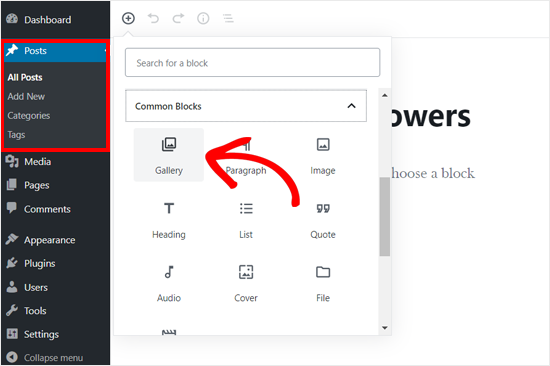
Step 1: It is necessary to edit the page or post where you wish to add the image gallery. Click the New Block icon on the post edit screen and choose the Gallery block.
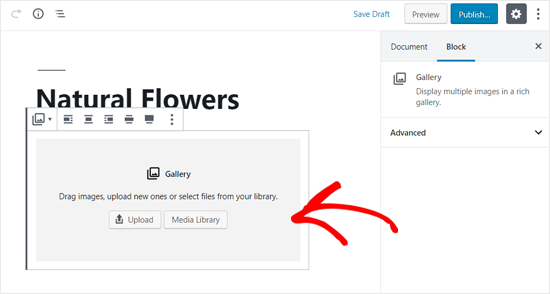
Step 2: Your WordPress editor will add the Gallery block, where you can upload photos from your computer by clicking the ‘Upload’ button. The gallery block will also display the previous photos you have uploaded.
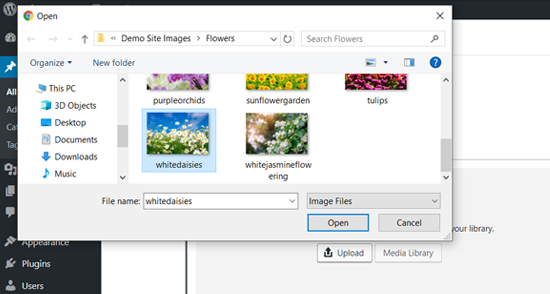
Step 3: By clicking on Upload, you’ll be able to upload one image at a time which is very time-consuming. So, you need to know how to add multiple images simultaneously. To do so, select and open multiple images using the Ctrl key on your keyboard.
Step 4: Once you complete the image uploading to your gallery, you can add captions to your images. For doing so, click on the images individually, and ‘Write a caption…‘ will appear in front of it. Enter the caption accordingly.

Step 5: Selecting the Media Library option will allow you to select images for your gallery all at once. On the right side of the attachment details panel, you can also add title, alt text, and captions to images as you select them.
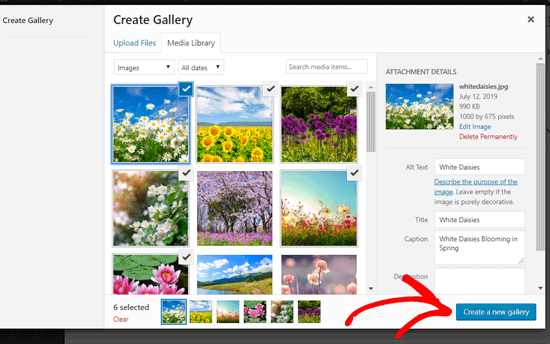
Step 6: Click on the ‘Create new gallery button‘ from the bottom right corner after selecting the images you may want to add.
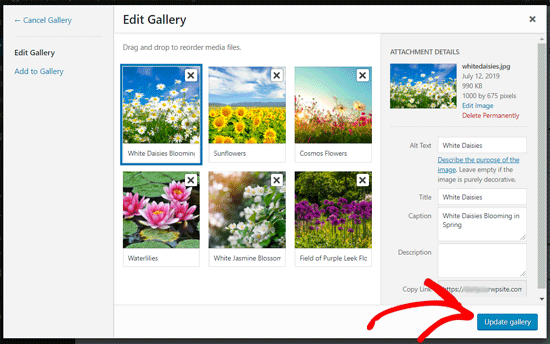
Then, the ‘Edit Gallery‘ page will be visible to you. Here you can add/review your photo captions. When you complete all, click on the ‘Update Gallery‘ button from the bottom right corner again.
Step 7: After that, your post edit screen will open with the gallery block settings panel on the right side. You may now select the number of columns for each row, activate or deactivate the Crop pictures option, and specify where you want your gallery photographs to be linked.
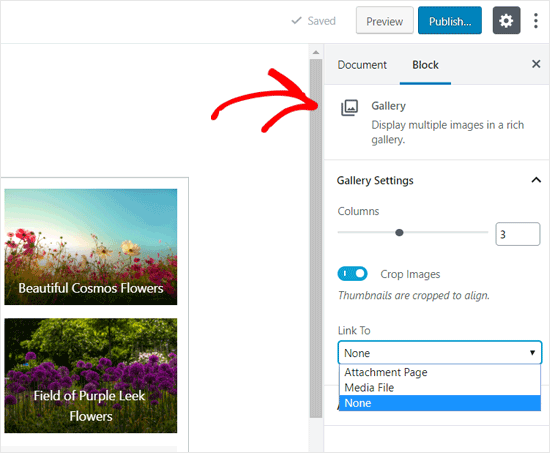
Step 8: If you want your users to just see your photo, select None from the Link to options. This option disables the picture clicking feature.
If you choose Media File, the photos will be accessible, and the image file will launch when you tap on it. If you pick the Attachment Page option, the attachment page will appear.
When you’re happy with the configurations, you may publish the article and view the gallery on your live site.
For example, here’s how our sample website’s picture gallery looked.
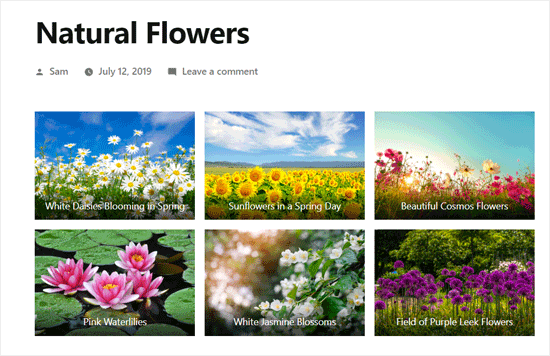
Wasn’t that really quick and simple?
It also appears to be attractive. However, if you often build image galleries, you will quickly find that it lacks several crucial capabilities.
For example, your photos will either not be clickable or will open in a new window. If you connect your gallery photos to a media file or attachment page, viewers may have to use the back button to return to the gallery.
It is not user-friendly, and the appearance of your gallery is determined by your theme. Most of the time, you just get one pretty generic style.
You cannot categorize your galleries into subjects, albums, tags, and so forth. Your gallery is not saved anywhere, and you will have to rebuild it if you really need to add it again.
If you want to add extra professional-looking photo galleries to your website, utilize the following technique.
The Envira Gallery plugin will be used for this method. It is the WordPress image gallery plugin that you can count on right now.
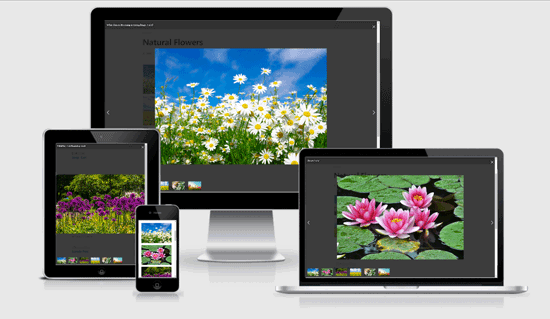
Envira makes it simple to build completely responsive, attractive, and contemporary image galleries in WordPress.
It is extremely quick and has several features such as a lightbox popup, simple image navigation, a drag and drop builder, and professional gallery designs.
Let’s start.
The first step is to install and activate the Envira Gallery plugin. If you’re a newbie to WordPress and need additional information, visit our step-by-step guide to installing a WordPress plugin.
After activation, go to the Envira Gallery > Settings page and enter your license key. This key may be obtained through your Envira Gallery account.
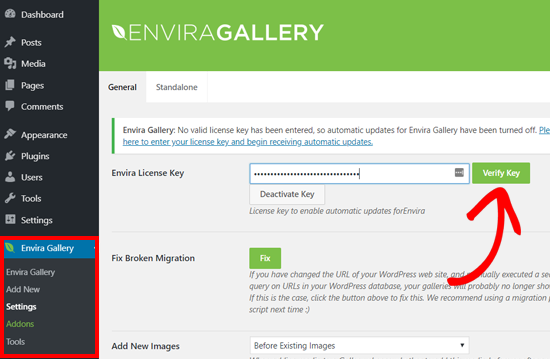
When license verification completes, go to the Envira Gallery > Add New page to create your image gallery in WordPress.
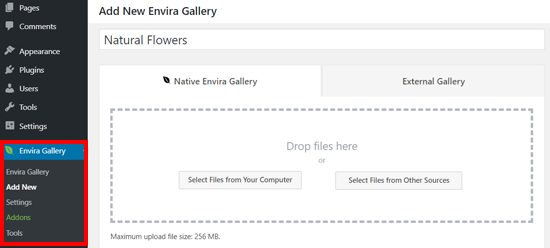
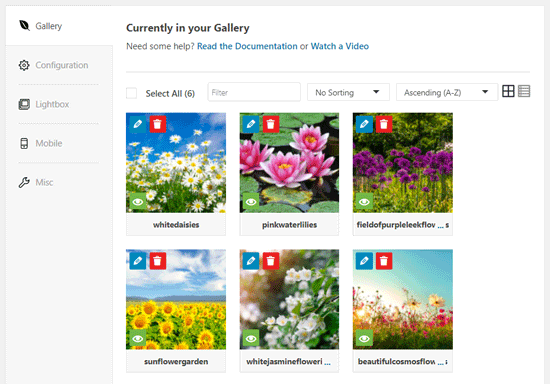
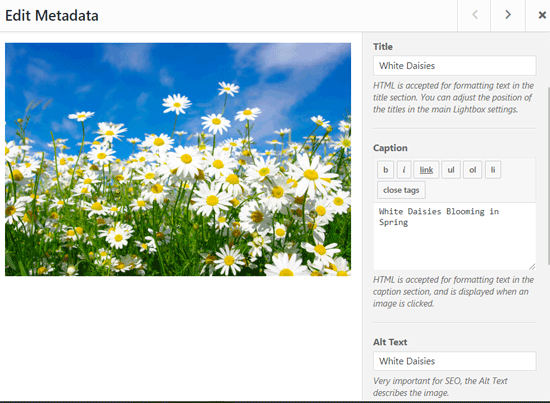
After that, select the ‘Configuration‘ option.
You may alter the number of columns, image slow loading, title and caption positions, margins, thumbnail sizes, heights, image dimensions, and so on from here.
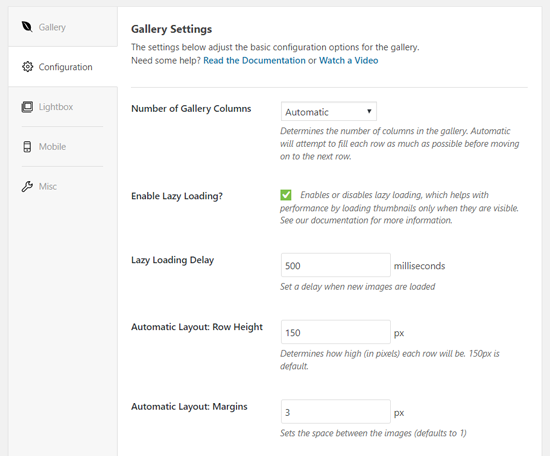
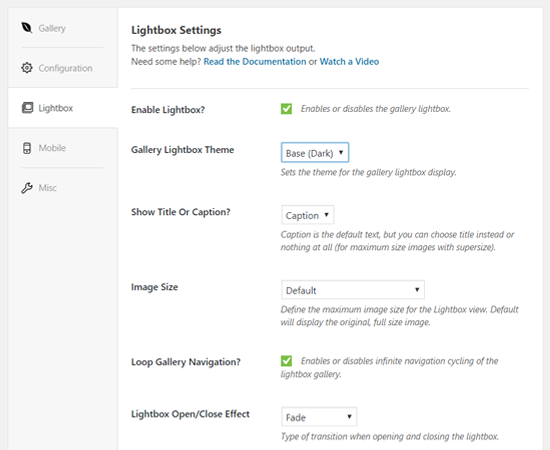
Following that, select the ‘Lightbox‘ tab.
The lightbox popup enables visitors to magnify and view photos without leaving the website.
The default settings are adequate for most sites, but you may check and modify them as necessary.
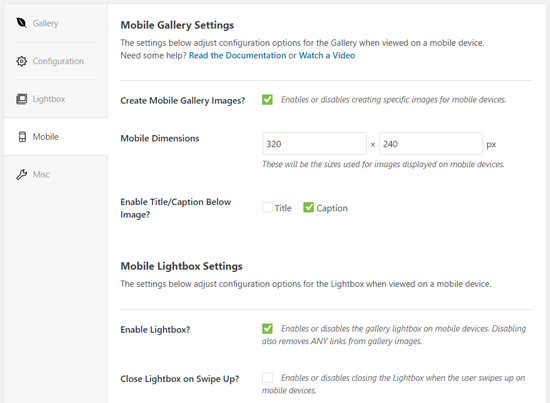
Then, under the ‘Mobile‘ option, you may modify your gallery settings for mobile devices. It lets you select picture sizes for mobile devices, activate or deactivate the lightbox, and many other things.
Following that, you may go through further settings in the ‘Misc‘ area, such as gallery slug and adding custom CSS.
You may now publish your gallery so that it can be posted to any page on your WordPress site.
Next, modify a post or page where you want your gallery to appear.
Click the Add New Block icon on the post edit page and then pick the Envira Gallery block.
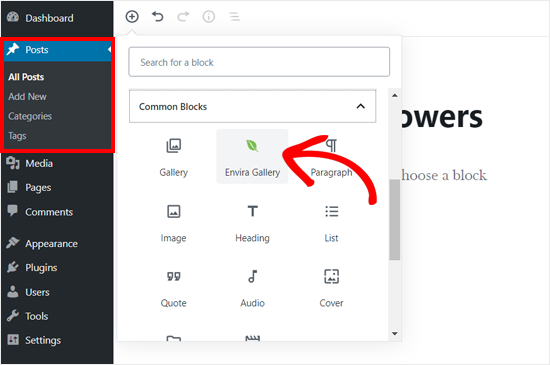
When you click on it, the Envira Gallery block will be added to the post editor. You may now search for a gallery by name or by using the dropdown arrow icon.
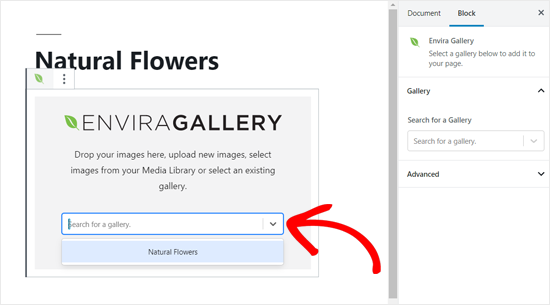
The plugin will then load your gallery into the post editor.
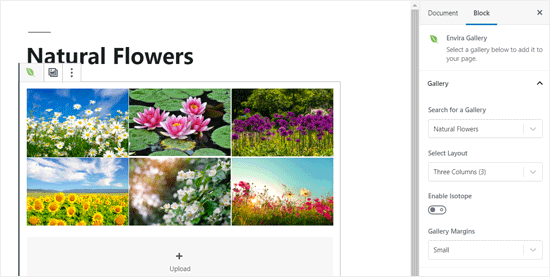
Then, using the block settings panel on the right side, you may go through your gallery settings one more time.
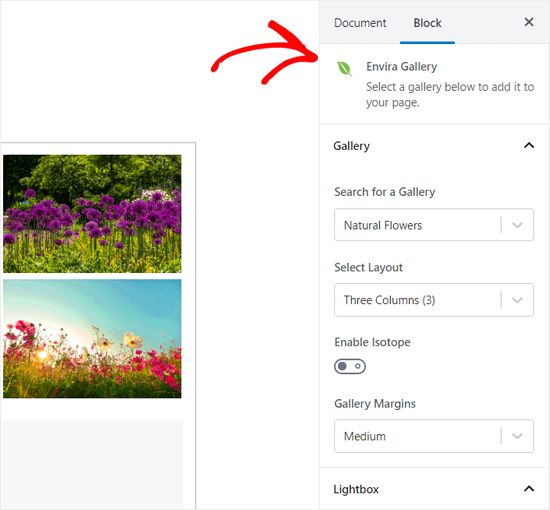
Now you can save your post. And preview to see what it looks like on your live website.

Any image in the gallery may be opened in a lightbox popup by clicking on it. You may navigate among photos in the lightbox by pressing the left and right arrow buttons on your keyboard or the screen.
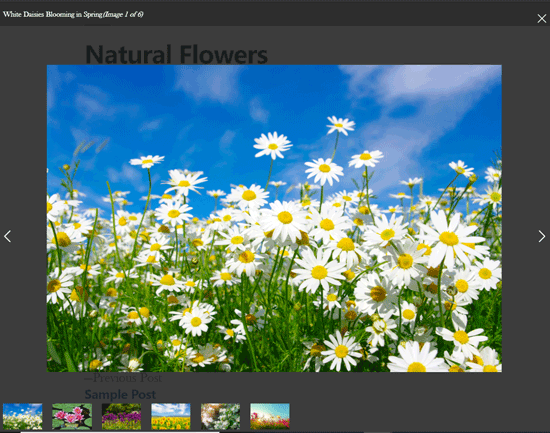
Your gallery will also look amazing on mobile. Users will be able to magnify images by tapping on them and swiping to see the next or previous image.
Up to this point, we hope the post helped you learn how you can create an Image Gallery in WordPress. You may want to see our guide on how you can fix the missing appearance menu in WordPress. You may also want to see how you can clear cache files in WordPress.
If you like this post, be with ThemeLooks and subscribe to our WordPress video tutorials on YouTube. We may also be found on Twitter, LinkedIn, and Facebook.