If you would like to add custom CCS to your WordPress site and looking for how to? Then, you’re in the right post at this moment.
However, as we all know layout and appearance attract readers or visitors to your WordPress site. As a result, changing the layout and appearance from the default one is a must. And, custom CSS can help you to change this.
There are a few methods available by which you can add custom CSS to your WordPress site. Among them, using FTP would be tough and confusing if the user is a total nube to WordPress.
But, no worries! There are other methods through which you can add custom CSS to your WordPress site easily. For instance, using a theme customizer, or a plugin.
Well, in this post, I’ll walk you through different processes of adding custom CSS to your WordPress site so that you can make your site more attractive than ever before.
Table of Contents
If you don’t know yet, CSS stands for Cascading Style Sheets. It’ll help you to make your WordPress website stylish by changing your site’s appearance and layout (in fact, the total look of your site).
Moreover, CSS and HTML are like each back of a coin. Both these will go together. Actually, CSS is used to style different HTML elements, such as color, layout, size, and display.
By adding custom CSS you can customize your site’s design and appearance in a way that is not possible by default. A few lines of code let you modify your WordPress theme easily, and it gives you greater control.
Suppose you want to make each post’s background color different instead of using the same color throughout the entire site. By adding CSS code to a post or page, you can customize its background.
Additionally, you can make changes to the appearance and style of product categories in your eCommerce store by using additional CSS.
In that regard, let’s explore a few different methods for adding custom CSS to your WordPress website.
You can only save custom CSS for the current theme with the first method. When you change themes, it is a must that you need to copy and paste your custom CSS into the new theme.
Using this method, you can customize CSS no matter which WordPress theme you’re using.
Start by installing and activating the Simple Custom CSS plugin. Please refer to our guide on how to install a WordPress plugin if you need help.
When the plugin is activated, simply click Appearance > Custom CSS and write your custom CSS down.
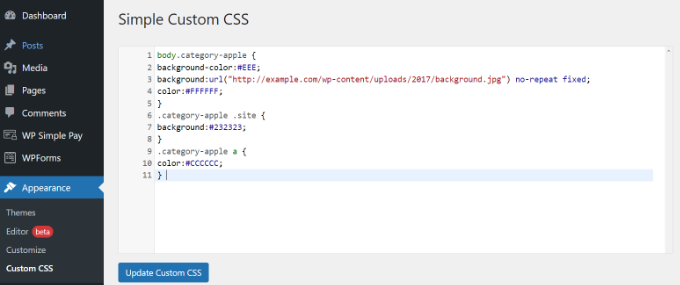
Be sure to click the ‘Update Custom CSS‘ button so your changes are saved.
Once you do this, you can view your WordPress website and see how your changes are reflected.
With the latest update to WordPress, users can now directly add CSS code to their site from the admin area. It is very easy to do, and you will see your changes immediately with a live preview.
The first step is to navigate to the Appearance > Customize page in your WordPress dashboard.
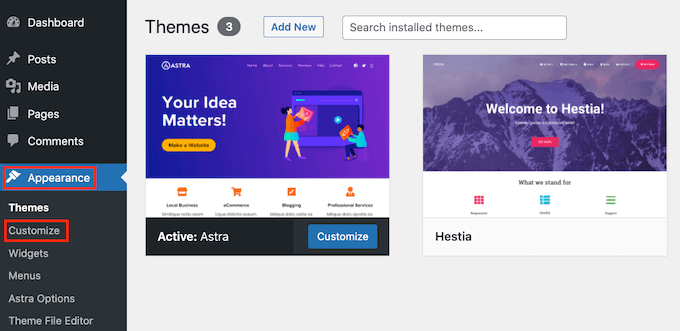
You will then be able to access the WordPress theme customizer.
On the left pane, you’ll see the live preview of your site and a bunch of options. Now, click on the Additional CSS tab that is on the left panel.
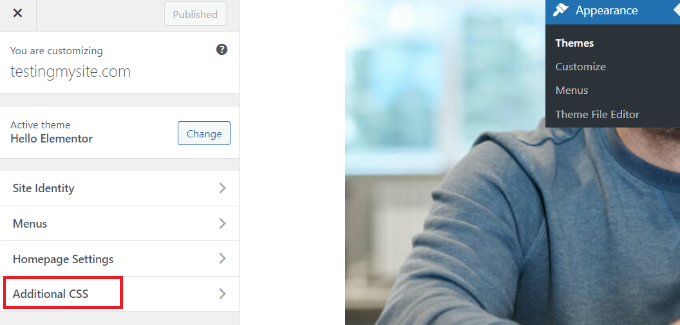
A simple box will appear where you can edit your CSS when the tab slides out. Within seconds of adding a CSS rule, your live preview will show it applied.

If you do not like how the site looks, you can add more CSS code to it until you are satisfied.
When you are done, make sure you click the ‘Publish‘ button at the top.
With theme customizer, you can only add custom CSS to themes that are compatible with that theme. Copy and paste it into your new theme using the same method if you wish to use it with another theme.
With the Full Site Editor (FSE), you can also add your own CSS to WordPress. You can use the FSE block editor to edit the layout and design of an entire website just as if you were editing a page or post.
You can add CSS more easily with a plugin. If, however, you prefer not to use a plugin, we will show you how to access the customizer without using a plug-in.
You simply need to copy and paste the following URL into your browser, replacing ‘example.com‘ with the domain name of your website.
Visit https://example.com/wp-admin/customize.php.
Theme customization is only available on the limited version of the page. You can add custom CSS at the bottom of the menu on the left.
To do so, click ‘Additional CSS.’
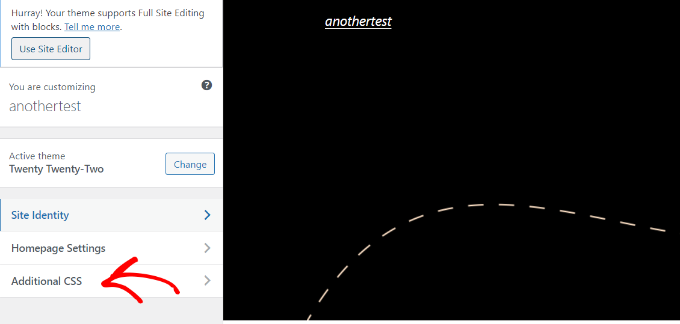
Now go ahead and enter your CSS code under the Additional CSS area.
After adding the code, simply click the ‘Publish’ button.

Now, enter the CSS code under the Additional CSS area. Once you add the codes, now simply click ‘Publish‘ to change the saves.
This is how you can add custom CSS to your WordPress website. Follow any of the above-mentioned methods, if any vacancy happens, let me know.
We’ve reached the conclusion of our post, and perhaps, you’ve learned something new. Follow any of the above-mentioned methods and add custom CSS to your WordPress site.
You may also want to see our guide on how to unpublish a WordPress page, also give this a shot as well to know how to uninstall and delete the WordPress theme.
If you have any questions or are confused about the procedures, please leave them in the comments area.
Please subscribe to our WordPress video tutorials on YouTube if you enjoyed this content. We may also be found on Twitter, Facebook, and LinkedIn.